How to Calibrate Your Thermostat
How to Calibrate Your Thermostat — A Step‑by‑Step Guide to Accurate Temperature Control
Thermostat calibration makes sure your thermostat's reported temperature matches the room's actual temperature so your heating and cooling run the right amount and your home stays comfortable. A well‑calibrated thermostat improves accuracy, cuts unnecessary runtime, and helps prevent short cycling that can wear out HVAC parts. This guide walks you through clear, practical steps for mechanical, digital, and smart thermostat calibration, how to spot warning signs that calibration is needed, the tools and safety steps to prepare, and when to call a pro. If you live in Newberg, OR or nearby, Renhard Heating and Cooling — our family‑run company since 1958 — can back your DIY work with professional calibration, smart thermostat setup, and maintenance plans. Read on for simple diagnostics, numbered calibration steps, tool comparisons, and a short FAQ to help you decide whether to do it yourself or request an estimate.
Why calibration matters for comfort and energy savings
A correctly calibrated thermostat reflects the real room temperature, which directly affects comfort and energy use. When your thermostat reads accurately, heating and cooling cycles run for the right amount of time, reducing temperature swings and wasting less energy. Proper calibration also helps prevent short cycling that stresses compressors and furnaces, extending equipment life and avoiding avoidable repairs. Knowing these benefits makes calibration an easy priority during routine HVAC upkeep.
What you gain from accurate thermostat calibration
Accurate calibration gives you steadier comfort and lower energy bills by making sure your setpoint matches the room’s actual temperature. Even a small error — around 2°F — can cause longer runtimes or too‑frequent starts, which pushes up energy use. Fixing that offset restores expected performance, evens out room‑to‑room differences, and reduces the chance of early component wear. For most homeowners, calibration is a high‑impact maintenance task that improves comfort, efficiency, and system longevity.
How a miscalibrated thermostat affects your system and your bills
A thermostat that reads incorrectly can cause short cycling, longer runtimes, and uneven temperatures — all of which raise energy costs and add mechanical wear. For example, a thermostat reading 3°F low can run the furnace longer than needed without improving comfort. Repeated on/off cycles stress compressors and relays and can accelerate failures that need professional repair. Because miscalibration often ties to placement or sensor drift, the right diagnosis tells you whether a simple calibration will fix it or a deeper HVAC service is required.
How to tell if your thermostat needs calibration

Several clear signs point to thermostat inaccuracy and the need for calibration or further troubleshooting. Watch for room temperatures that don’t match a reference thermometer, visible short cycling of your HVAC, and unexplained jumps in energy use when habits haven’t changed. Catching these patterns early lets you run simple checks and possibly correct the offset before it becomes a mechanical problem. The table below helps you match symptoms with likely causes and decide if a DIY calibration is appropriate or if you should call a technician.
This quick symptom guide helps you prioritize easy DIY checks — such as comparing readings with an independent thermometer — and shows when a professional diagnosis is the safer route. Knowing likely causes speeds troubleshooting and improves the chance of a successful fix.
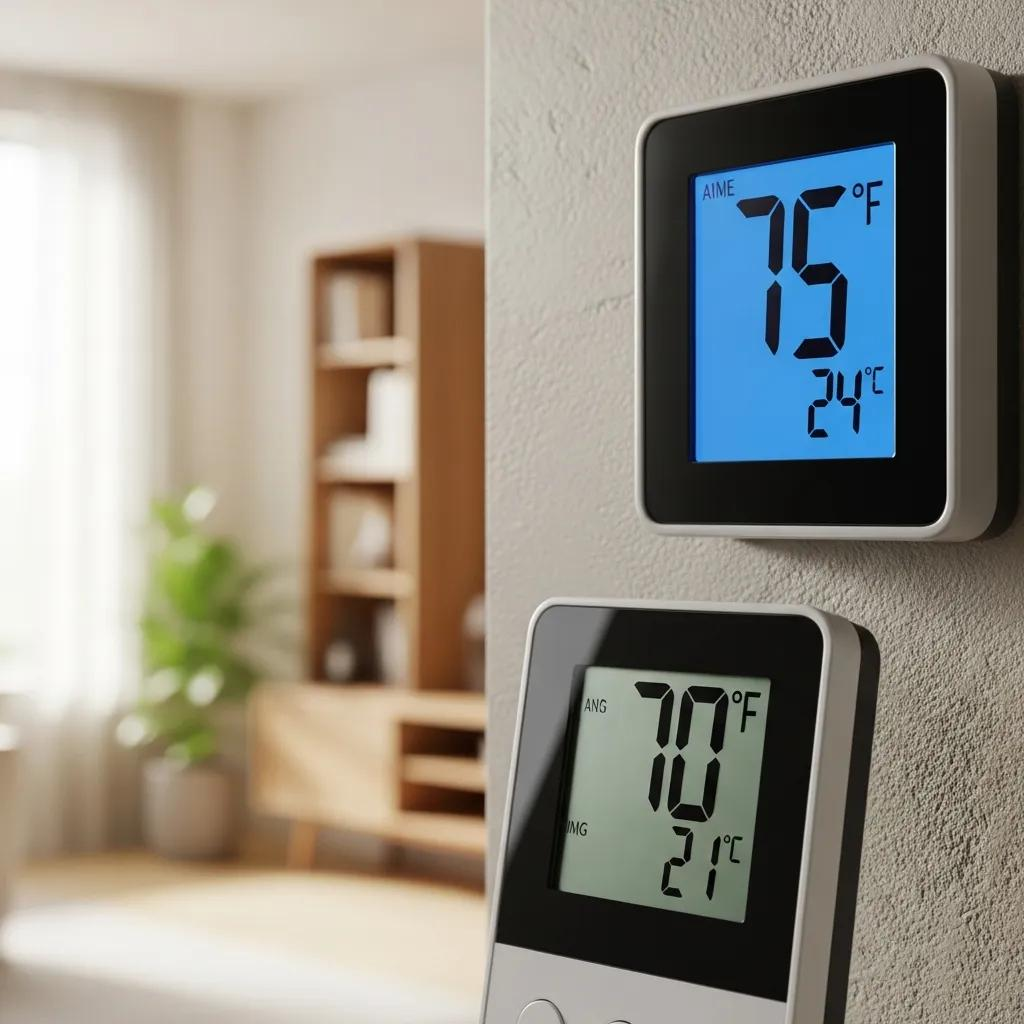
How to spot inconsistent readings and HVAC short cycling
Start with a reliable digital thermometer placed near the thermostat and in rooms that feel off, and compare readings over a few hours to see if differences persist. Track HVAC runtime by noting how long the system runs and how often it cycles on and off during normal use — short cycles are usually under 10 minutes and indicate a control issue. Log data across different setpoints and times of day so you see patterns, not one‑off events. Those measurements tell you whether to adjust calibration, move the thermostat, or call a technician for electrical or control diagnostics.
When to calibrate and when to replace your thermostat
Try calibration when readings differ by more than 2°F, there are no wiring or mechanical faults, and the thermostat otherwise functions normally. Consider replacement if the thermostat is 10–15 years old, lacks features you want (like smart scheduling or remote sensors), or if calibration repeatedly fails to stabilize readings. Recurring wiring trouble, display errors, or control‑board faults usually need professional replacement rather than tuning. Compare age, frequency of issues, and desired features to decide whether calibration, repair, or a smart upgrade is best.
What tools and prep work you need for thermostat calibration
Good calibration starts with the right tools and safe prep: a reliable thermometer, basic screwdrivers, and a phone or notebook to document wiring and settings. A digital thermometer with ±1°F accuracy is the best way to compare readings; a small Phillips and flathead set covers most adjustments. Before you begin, turn off thermostat power at the breaker, remove batteries, and photograph wiring so you can restore everything exactly — these steps prevent wiring mistakes and accidental system starts. With tools and safety in place, proceed with the calibration method that matches your thermostat type.
Tool selection explained with practical examples and usage:
Using the right tools reduces guesswork and the risk of damage during calibration. A dependable thermometer and simple hand tools cover most homeowner needs and make it easier to hand off a clear description to a technician if you decide to call one.
Which tools are essential for manual and digital thermostat calibration?
Manual thermostats typically need a small screwdriver and an accurate room thermometer to compare the dial reading with actual temperature and adjust the calibration screw. Digital thermostats usually have a temperature offset option in the menu; you still need a reliable thermometer to find the correct offset and small tools to access the device if batteries must be removed. For electrical checks or intermittent wiring problems, a basic multimeter helps, but it’s optional for most DIYs. A solid thermometer and a couple of screwdrivers will handle most calibration jobs safely.
How to prepare your HVAC system safely before calibrating
Always turn off HVAC power before removing the thermostat cover — switch off power at the thermostat and at the breaker or furnace switch to prevent accidental starts. Photograph the wiring and labels so you can reassemble everything correctly, then remove batteries and work in a dry area free of static. Try to do the work during mild weather so your home stays comfortable while testing; only restore power after adjustments are complete and wiring is confirmed. These precautions lower the risk of shorts, blown fuses, or control errors that complicate calibration.
Calibrating a manual thermostat — step‑by‑step
Mechanical thermostats use a bimetallic strip or sensing element that can drift with age; calibration brings the indicated temperature in line with actual room conditions. The process is simple: record current readings, make very small adjustments to the calibration screw or scale, and let the thermostat stabilize between moves. Wait for a full heating or cooling cycle before making more changes, and note each tiny adjustment so you don't overcorrect. The steps below work for most manual thermostats.
- Turn off thermostat power and remove the cover, leaving wiring in place.
- Set a digital thermometer 3–4 ft from the thermostat and note the ambient temperature.
- Find the calibration screw or adjustment dial behind the cover and plan to make very small (about 1/8‑turn) adjustments.
- Restore power, wait for the thermostat to respond, then compare readings and repeat small adjustments until it matches the reference thermometer.
These steps focus on tiny, measured changes and on giving the sensing element time to settle. If the calibration screw is missing or inaccessible, or if adjustments don’t fix the reading, the thermostat may need replacement or professional help.
Exactly how to adjust the calibration screw
Locate the calibration screw near the sensing element or behind the dial and turn it in tiny increments. A common rule is 1/8‑turn each time, then wait 15–30 minutes for the thermostat to stabilize before re‑checking with your thermometer. Keep a note of direction and amount for each turn so you can undo any change. Generally, clockwise raises the reading and counterclockwise lowers it, but check your model’s markings if present. If adjustments keep failing or the device behaves inconsistently, stop and call a technician to avoid causing further issues.
How to test and confirm manual thermostat calibration
After you adjust, confirm calibration by watching a full heating or cooling cycle to see if the thermostat triggers the system at the expected temperatures. Place thermometers in several rooms for 2–4 hours and log temperature stability, runtimes, and any continued short cycling; consistent readings across locations show a successful calibration. If the readings remain off or runtimes look abnormal, repeat small adjustments or switch to a digital offset if available. Proper validation ensures both thermostat accuracy and correct HVAC response.
Calibrating digital and smart thermostats — settings and software
Most digital and smart thermostats offer a menu‑based temperature offset or calibration setting that adjusts the reported temperature without mechanical work. The offset is a software correction applied to the internal sensor: find the difference between the thermostat and a reliable thermometer, then enter that value in the device’s menu or mobile app. Learning thermostats that adapt over time can make immediate results less obvious, since their algorithms change schedules and behavior — knowing that helps you decide whether to use an offset or let the thermostat learn. Below is a brief set of steps and a comparison of thermostat types and common calibration approaches.
Smart thermostat calibration also considers the thermal behavior of the room it’s in; properly tuned models help balance comfort with energy savings.
How to access calibration mode on common digital thermostats
Many digital thermostats have a "Temperature Offset," "Calibration," or "Sensor Offset" option in the settings menu. You’ll usually find it in system or installer settings. Because menu paths vary by brand and firmware, check the manual or manufacturer support if you can’t find it. Make the thermometer comparison first so you know the exact offset to enter. If your thermostat doesn’t expose an offset, look into remote sensor options or relocation to improve accuracy. When the software won’t let you adjust, a technician can determine whether sensor replacement or other work is needed.
Best practices for smart thermostats like Nest and Ecobee
For learning thermostats, focus on correct placement and using remote sensors before forcing an offset — the algorithms learn from historical data and additional sensors and may resolve apparent differences over days. Avoid mounting thermostats near drafts, direct sunlight, or heat sources; pick an interior wall about shoulder height for representative readings. If you use remote sensors, place them in commonly used rooms to give the system a better average temperature, and allow several days for the thermostat to learn. Following these steps reduces the need for manual offsets and helps smart features deliver even comfort and energy savings.
When to call a professional HVAC technician in Newberg, OR
Call a pro if your calibration attempts don’t fix the problem, if wiring looks damaged or intermittent, or if calibration issues occur alongside HVAC problems like persistent short cycling or compressor warnings. Complex faults — such as control board failures, broken sensors, or multi‑zone integration issues — need diagnostic tools and safety procedures best handled by trained technicians. If you’d rather skip DIY or want a dependable estimate and setup, a local HVAC service will perform safe, warranty‑respecting work and verify thermostat accuracy and system response.
Which complex issues require expert calibration or replacement?
Complex situations include intermittent wiring faults, failed thermostat sensors, control board malfunctions, or cases where the thermostat is calibrated correctly but the HVAC doesn’t respond. These often show up as persistent errors after multiple attempts, strange error codes, or uneven heating and cooling across zones despite correct setpoints. Technicians use multimeters, control diagnostics, and system testing to pinpoint whether the thermostat, wiring, or equipment is at fault. Because these problems can involve line voltage and delicate electronics, professional work reduces risk and gives a lasting fix instead of repeated DIY attempts.
How Renhard Heating and Cooling can help with smart thermostat setup and upkeep
Renhard Heating and Cooling provides local smart thermostat services including professional installation, calibration, troubleshooting, and maintenance plans to keep temperature control accurate and systems reliable. As a family business serving Newberg since 1958, we focus on certified technicians, clear pricing, and a satisfaction guarantee. Scheduling a visit gives you hands‑on verification of thermostat accuracy, secure wiring checks, and advice on placement or remote sensor setup to optimize performance. If you prefer a professional setup or are dealing with recurring inaccuracies, we’ll pair experience with equipment‑level testing to restore reliable control.
How often should you check thermostat calibration?
Check calibration at least once a year — ideally before the heating and cooling seasons — to catch sensor drift or placement issues. Do a quick verification with a digital thermometer each season and after any HVAC service or remodeling that could affect the thermostat location. If you notice temperature inconsistencies or unusual energy use between checks, investigate sooner. Regular seasonal checks keep small problems from becoming big ones.
Can most homeowners calibrate their thermostat, or is professional help recommended?
Many homeowners can handle calibration for manual and digital thermostats if they’re comfortable with basic tools and safety steps. Call a pro when wiring looks damaged, calibration won’t fix the issue, or you need system‑level diagnostics. If you’re unsure, a single professional visit can tell you whether calibration will help and recommend repair or replacement if needed.
What causes thermostat inaccuracy and when does calibration help?
Common causes include poor placement (near drafts, sunlight, or heat sources), sensor drift with age or contamination, low batteries, and wiring faults. Calibration corrects sensor offset but won’t fix placement or wiring problems. Address placement and batteries first, then use a calibration offset or mechanical adjustment if readings remain off. For wiring or control‑board faults, calibration won’t solve the root cause and a technician should diagnose the issue.
These answers aim to help you weigh DIY steps against professional service. When in doubt, local technicians can verify results, protect warranties, and make sure your thermostat and HVAC system run reliably.
Conclusion
Keeping your thermostat calibrated is a simple way to improve home comfort and reduce wasted energy while helping your HVAC equipment last longer. Follow the checks and steps in this guide, and if you want help or a professional tune‑up, Renhard Heating and Cooling is here for Newberg homeowners. Schedule a consultation with our experienced team and we’ll make sure your thermostat and system are working together the right way.
Customer Testimonials
Hear what our satisfied Newberg, OR, customers have to say about the honest, reliable service they've received from our multi-generational team.

Latest Posts

Upgrade to Energy Efficient HVAC for Maximum Savings